Assembling a Bluetooth speaker kit is a rewarding project for tech enthusiasts and beginners alike. It provides valuable insights into how audio devices work, and you end up with a custom-built speaker system tailored to your preferences. This guide will take you through each step of the assembly process, ensuring you can follow and understand each stage easily.
Unboxing and Inspecting Components
Inventory Check
Start by unboxing your Bluetooth speaker kit. Lay out all the components on a clean, flat surface for easy access and visualization. Your kit should generally include the following:
- Speaker driver(s)
- Bluetooth module
- Amplifier board
- Battery (if applicable)
- Enclosure or speaker box
- Wiring and connectors
- Screws and mounting hardware
- Instruction manual
Once you have everything laid out, verify that all parts are present according to the inventory list in the instruction manual. Missing parts can stall your project, so if anything is missing, contact the seller or manufacturer for replacements promptly. This initial step ensures you have everything needed and helps you become familiar with the components you’ll be working with.
Component Inspection
Before diving into assembly, inspect each component for any visible damage. Check the speaker drivers for any tears in the cone or surround and ensure the Bluetooth module and amplifier board are free from broken solder joints or damaged connectors. Examine the battery (if included) for any signs of swelling or leakage. Verifying the condition of each part ensures you begin the assembly with functioning components, mitigating potential issues down the line.
Preparing Your Workspace
Setting Up Your Area
A well-organized workspace can make the entire assembly process smoother and more enjoyable. Choose a clean, flat surface with ample lighting, such as a workbench or a sturdy table. Gather all the tools you’ll need for the assembly. These may include:
- Screwdrivers (Phillips and flathead in various sizes)
- Pliers
- Soldering iron and solder
- Wire cutters and strippers
- Electrical tape or heat shrink tubing
- Multimeter (optional but useful for checking connections)
Organize your tools and components within arm’s reach. This setup will prevent unnecessary movement during assembly and help maintain focus and efficiency.
Safety Precautions
Take necessary safety precautions before starting. If you’re using a soldering iron, ensure you work in a well-ventilated area and wear safety glasses to protect your eyes from splatter. Be mindful of hot surfaces and sharp edges. Keep your workspace tidy to avoid accidents, and always unplug electrical tools when not in use. Safety first ensures a smooth and injury-free assembly process.
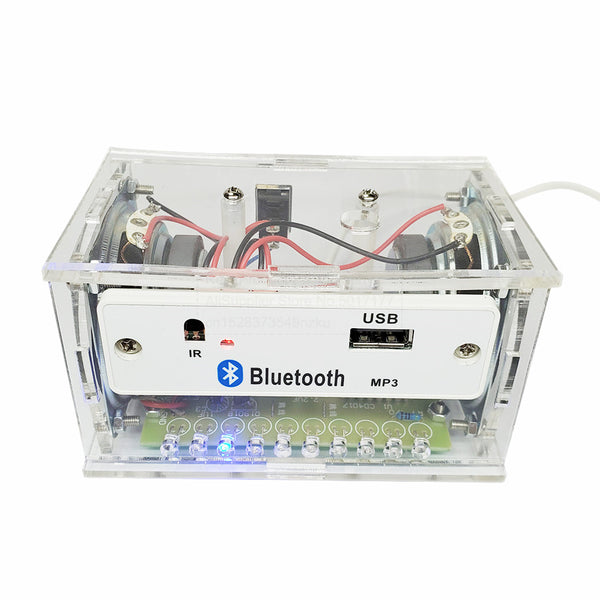
Assembling the Circuit
Connecting the Bluetooth Module
Begin the assembly by connecting the Bluetooth module to the amplifier board. Refer to the instruction manual for detailed wiring instructions, but generally, you will connect the power, ground, and audio output wires from the Bluetooth module to corresponding terminals on the amplifier board. Use a soldering iron to make secure connections, and double-check the polarity of each wire connection to avoid damaging the components.
A good solder joint should be shiny and smooth, ensuring reliable electrical connectivity. If you’re new to soldering, practice a few joints on a scrap piece of wire or circuit board before working on the actual components.
Installing the Amplifier Board
Next, install the amplifier board in the designated location within the enclosure. Position the amplifier board accurately and secure it using the screws and mounting hardware provided in the kit. Make sure the board is securely attached to avoid any movement that could disrupt the connections. Tighten the screws firmly but avoid overtightening, which could risk damaging the board’s structure. Check all connections for accuracy and ensure they are firmly in place.
Wiring the Speaker Driver
Preparing the Wires
Cut wires to appropriate lengths to connect the amplifier board to the speaker driver efficiently. Strip around half an inch of insulation from each end using wire strippers, ensuring clean, exposed wire for connection. Twist the exposed wire strands to maintain better conductivity and prevent stray wires. If using heat shrink tubing, remember to slide it over the wire before making connections. This preparation ensures clean and efficient wiring without excess lengths, preventing clutter inside the enclosure.
Making the Connections
Connect the wires from the amplifier board to the speaker driver, matching the positive terminal of the amplifier to the positive terminal of the speaker, and the negative to the negative. Secure these connections with solder to ensure they are stable and won’t come loose over time. Once the connections are made, cover exposed wire with electrical tape or slide the heat shrink tubing over the connection and apply heat to secure it. Double-check the stability of each connection to ensure consistent audio performance and signal integrity.
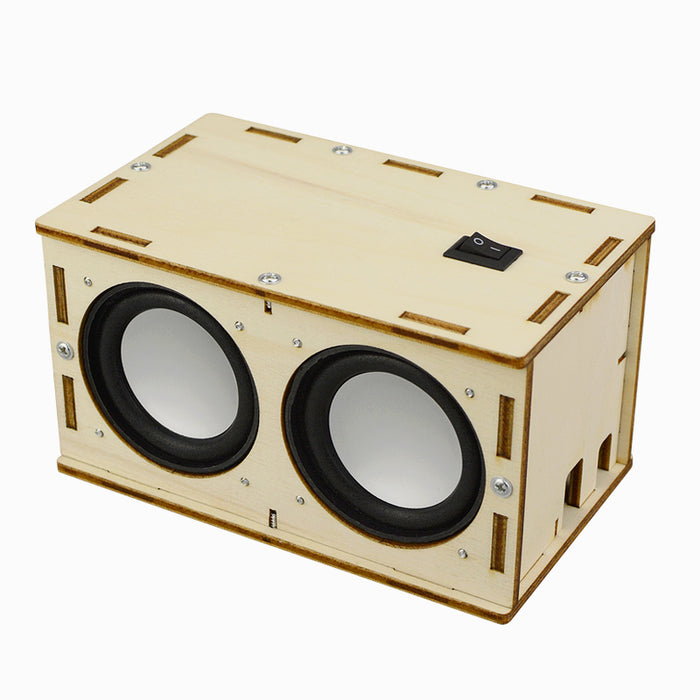
Installing the Speaker Driver
Positioning the Driver
Carefully place the speaker driver in its designated location within the enclosure. Ensure that the mounting holes on the driver align perfectly with those on the enclosure. This proper alignment is crucial for both the aesthetic and functional aspects of the speaker, preventing any sound leakage and ensuring a clean look.
Securing the Driver
Use the screws provided in the kit to secure the speaker driver to the enclosure. Tighten the screws in a criss-cross pattern to distribute pressure evenly, preventing the warping of the driver or damage to the speaker cone. Firmly secure all screws but be cautious not to over-tighten, as this could cause damage. Make sure the driver is flush with the enclosure, ensuring optimal sound quality and performance.
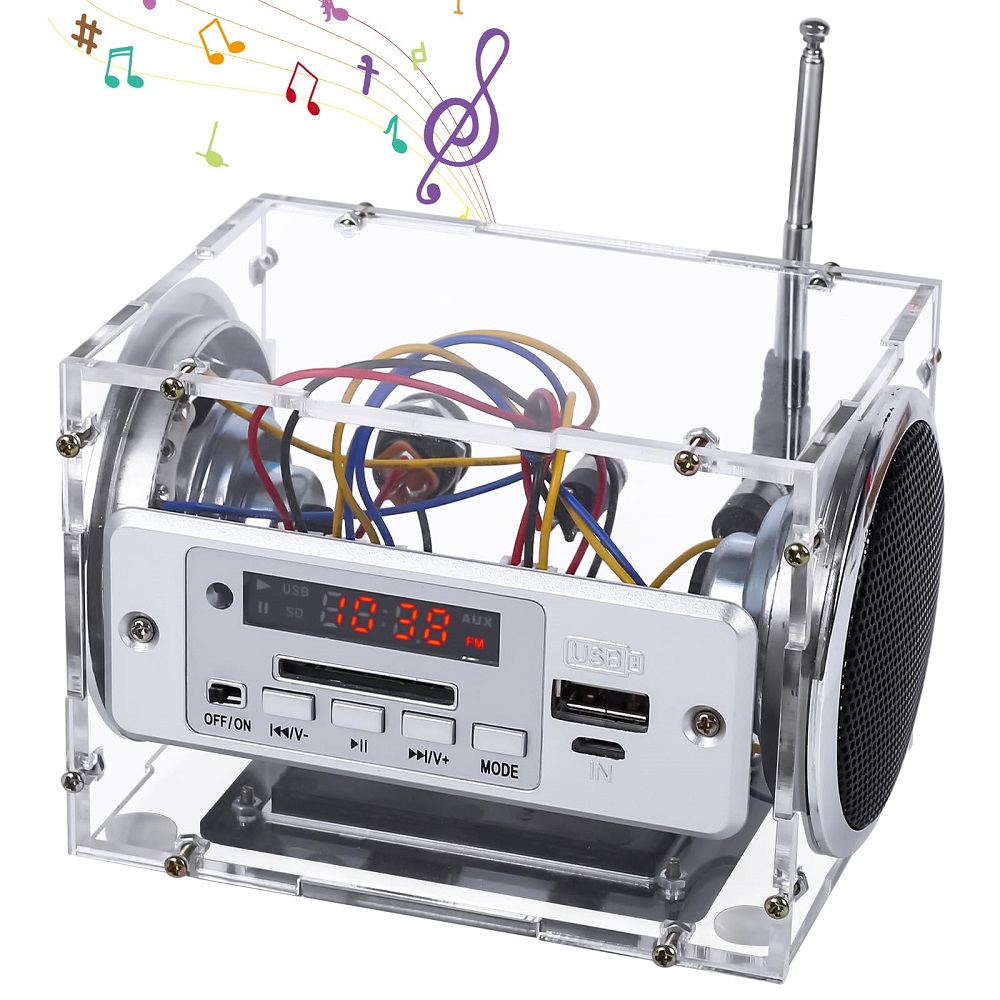
Adding the Battery and Power Supply
Connecting the Battery
If your Bluetooth speaker kit includes a battery, follow the manual’s instructions to connect it to the amplifier board. Check the polarity carefully before making the connection to avoid any short circuits or damage. Secure the battery within the enclosure using mounting hardware, adhesive strips, or velcro as recommended. Proper securing prevents the battery from moving around, which could disconnect wires or cause internal damage when the speaker is in use.
Power Supply Considerations
For kits relying on an external power supply, connect the power adapter to the amplifier board, ensuring the voltage and current ratings are within the specifications provided in the manual. Improper power connections can lead to malfunction or even permanent damage to your speaker. If you’re using an external wall adapter, ensure it is plugged into a stable outlet that is easily accessible and can be disconnected quickly if needed.
Testing and Final Adjustments
Initial Test
Before sealing the enclosure, perform an initial test to verify the functionality of your Bluetooth speaker kit. Connect the power supply or battery, and turn on the Bluetooth module. Pair the module with a Bluetooth-enabled device, such as a smartphone or tablet, and play some audio. Ensure the speaker is functioning correctly, paying attention to clarity and volume. Listen for any distortion or irregularities, which could indicate loose connections or faulty components. This test step ensures every part is working as expected before completing the assembly.
Troubleshooting Issues
If the speaker doesn’t function as expected, refer to the troubleshooting section of the manual. Common issues may include reversed wire connections, poor solder joints, or misaligned components. Carefully inspect all wiring and connections to identify any problems. Use a multimeter to check electrical continuity if necessary. Address any identified issues, and retest the system to ensure everything is working correctly. This troubleshooting process helps in ensuring that the final assembly is functional and reliable.
Final Assembly
Once your speaker passes the initial test, proceed with the final assembly. Secure any loose wires with cable ties or adhesive clips to prevent them from moving around inside the enclosure. Attach and tighten the remaining screws to close the enclosure securely. Ensure all parts are tight and fit well together. This final step makes your speaker ready for regular use, combining functionality with a neat and tidy appearance.
Conclusion
Enjoy Your Handcrafted Bluetooth Speaker
Congratulations! You’ve successfully assembled your Bluetooth speaker kit. Take pride in your work and enjoy the satisfaction of creating something both functional and unique. Your new speaker is ready to fill your space with high-quality sound, customized to your preferences. Whether you use it for music, podcasts, or other audio content, appreciate the effort and creativity you’ve put into building it.
Maintenance and Upgrades
Regularly check your speaker for any signs of wear or loose connections. Keep it clean and free from dust to maintain its performance. As you become more comfortable with DIY electronics, consider upgrading individual components for enhanced performance. Swapping out the amplifier, Bluetooth module, or speaker drivers can lead to even better sound quality. Maintaining and upgrading your speaker ensures long-term satisfaction and performance.
Sharing Your Experience
Share your experience with fellow DIY enthusiasts. Document your build process, troubleshooting steps, and final results. Offer insights and tips to others in online forums, social media groups, or blogs. Your journey can inspire and assist others eager to build their Bluetooth speakers. Sharing your experience enhances your knowledge and contributes to the DIY community.
Ready for the Next Project
Completing this project opens the door to more advanced DIY electronics. With newfound confidence and skills, consider exploring other kits or even creating your custom audio solutions from scratch. The skills and experience gained here can be applied to more complex projects, expanding your capability and creativity. The sky’s the limit for your next DIY adventure!