
I. Introduction

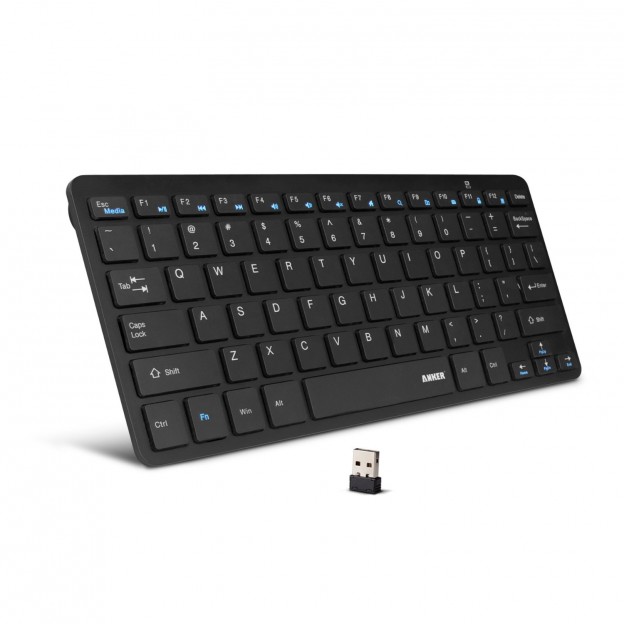
In today’s era of technology, wireless devices have become an integral part of our lives. One such device that offers convenience and ease of use is the Anker Bluetooth keyboard. This compact and ergonomic keyboard is not only stylish but also incredibly functional, making it a must-have accessory for individuals who are constantly on the go.
Pairing the Anker Bluetooth keyboard with your device is a crucial step that allows you to enjoy its full potential. Whether you want to enhance your productivity or enjoy hassle-free typing, understanding the step-by-step process of pairing the keyboard is essential. In this comprehensive guide, we will walk you through the process and highlight the benefits of pairing.
II. Preparing for Pairing
Before diving into the actual pairing process, there are a few essential steps that you need to undertake to ensure a smooth and successful connection.
A. Checking Compatibility
First and foremost, it is crucial to verify the compatibility of the Anker Bluetooth keyboard with your device. The keyboard is designed to be compatible with a wide range of devices, including smartphones, tablets, and computers. However, it is important to check if your device has Bluetooth capabilities and supports external keyboards.
B. Charge the Keyboard

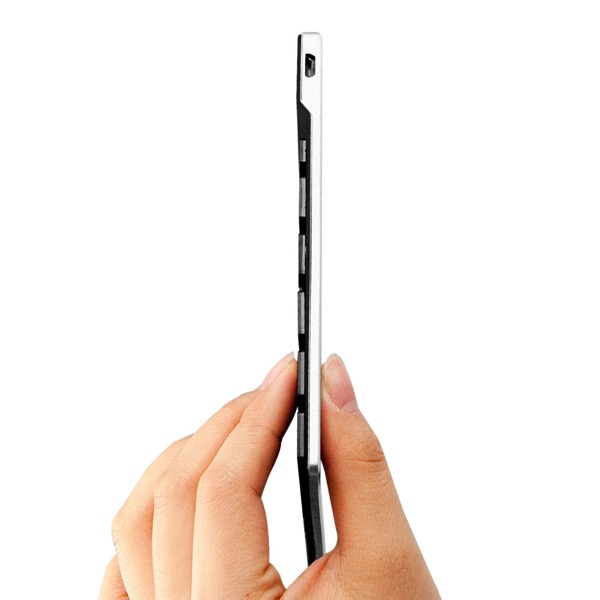
To avoid any interruption during the pairing process, it is imperative to ensure that the Anker Bluetooth keyboard has sufficient charge. Connect the keyboard to a power source using the provided USB cable and allow it to charge until the battery is full. Once fully charged, you can proceed with the pairing process without any worries.
III. Pairing Process
Now that you have completed the necessary preparations, let’s delve into the step-by-step process of pairing your Anker Bluetooth keyboard with your device.
A. Activate Bluetooth Mode
To initiate the pairing process, you first need to activate the Bluetooth mode on the keyboard. Locate the Bluetooth button on the keyboard, which is usually indicated by the Bluetooth symbol or an icon. Press and hold the button for a few seconds until the Bluetooth indicator light starts flashing. This signifies that the keyboard is in pairing mode and ready to establish a wireless connection.
B. Enable Bluetooth on the Device
Next, navigate to the settings menu of your device and enable the Bluetooth function. Depending on your device, this option may be found in the connectivity or wireless settings. Once you have located the Bluetooth settings, toggle the switch to turn it on. Your device will now start scanning for available Bluetooth devices in its proximity.
C. Searching for the Keyboard
While your device is scanning for Bluetooth devices, make sure that you are in close proximity to the Anker Bluetooth keyboard. This will ensure a strong and stable connection. As your device discovers the keyboard, it will display it in the list of available devices.
D. Selecting the Keyboard
Once the Anker Bluetooth keyboard is displayed on your device, tap on its name to select it. Some devices may require you to enter a passkey at this stage. If prompted, refer to the documentation or the keyboard’s user manual for the default passkey. The default passkey is typically “0000” or “1234”. Enter the passkey on your device to proceed with the pairing process.
E. Entering the Passkey
After entering the passkey, your device will establish a connection with the Anker Bluetooth keyboard. You may notice that the Bluetooth indicator light on the keyboard stops flashing and remains steady. This indicates a successful pairing between the keyboard and your device.
F. Completing the Pairing Process
Congratulations! You have successfully paired the Anker Bluetooth keyboard with your device. To ensure that the pairing process is complete, test the keyboard by typing a few characters in a text document or an application that requires input. If the characters appear on your device’s screen, it means that the keyboard is functioning correctly.
IV. Troubleshooting Tips

Bluetooth technology has vastly improved the way we connect and interact with our devices. However, like any technology, it is not without its faults. If you’re experiencing issues with your Bluetooth keyboard, here are some troubleshooting tips to help you resolve the problem.
A. Ensure Bluetooth Is Enabled
The first step in troubleshooting your Bluetooth keyboard is to ensure that Bluetooth is enabled on both your keyboard and your device. On your keyboard, check for a Bluetooth button or a switch that needs to be turned on. On your device, locate the Bluetooth settings and toggle it on.
B. Restart Devices
Sometimes, a simple restart can solve connectivity issues. Turn off both your keyboard and device, wait for a few seconds, and then turn them back on. This allows both devices to reset their connections and could potentially resolve any underlying issues.
C. Clear Existing Pairings
If you’ve previously connected your Bluetooth keyboard to other devices, there might be conflicts that hinder the connection process. Clearing existing pairings ensures a fresh start. On your keyboard, locate the pairing or reset button and press it for a few seconds to clear any previous connections. On your device, go to the Bluetooth settings, find the keyboard, and select “Forget” or “Unpair.”
D. Update Device’s Bluetooth Drivers

Outdated or incompatible Bluetooth drivers can cause connectivity issues. To update your device’s Bluetooth drivers, go to the manufacturer’s website and search for the latest drivers for your specific device model. Download and install the drivers.
E. Reset the Keyboard
If all else fails, you can try resetting your Bluetooth keyboard to its factory settings. This removes any customized settings that might be causing issues. Refer to the manufacturer’s instructions on how to reset your specific keyboard model.
V. Common Pairing Errors and Solutions
Even with the above troubleshooting tips, you may encounter some common pairing errors. Here are some solutions to address these errors.
A. “Keyboard Not Found” Error
If you receive a “Keyboard Not Found” error, ensure that your keyboard is in pairing mode and within range of your device. Also, check that Bluetooth is enabled on your device and that you’ve cleared any existing pairings as mentioned earlier. If the issue persists, try restarting both devices.
B. “Connection Unsuccessful” Error
An “Unsuccessful Connection” error can be caused by various factors. Ensure that your keyboard is charged or has fresh batteries. If your keyboard has a power-saving mode, disable it temporarily during the pairing process. Make sure your device’s Bluetooth settings are configured to allow new connections.
C. “Passkey Incorrect” Error
When pairing your keyboard, you might encounter a “Passkey Incorrect” error. Double-check that you’ve entered the correct passkey. If the passkey is not working, try using a different passkey provided by the manufacturer or refer to the user manual for troubleshooting steps.
VI. Testing the Connection
After troubleshooting and pairing your Bluetooth keyboard successfully, it’s essential to test the connection to ensure everything is working correctly. Here are two tests you can perform.
A. Typing Test
Open a word processing application or a text field on your device and start typing on the Bluetooth keyboard. Check if the keystrokes appear correctly on your screen. Test all the keys to ensure they’re functioning as expected.
B. Functional Test
Apart from typing, test other functions of your Bluetooth keyboard, such as media controls, volume buttons, and special function keys. Make sure these functions work as they should on your connected device.
VII. How To Connect Anker Keyboard
- Turn on Bluetooth:
Before beginning the connection process, ensure that the Bluetooth functionality is enabled on your device. Go to your device settings and toggle on Bluetooth if it’s not already enabled. - Activate Bluetooth Mode on the Anker Keyboard:
On your Anker Keyboard, locate the Bluetooth button. Press and hold it for a few seconds until the Bluetooth indicator starts flashing. - Pairing the Anker Keyboard with a Computer:
On your computer, navigate to the Bluetooth settings. Click on “Add Device” or “Pair a New Device.” Wait for your computer to discover the Anker Keyboard. Once found, select it from the list of available devices. If prompted, enter the pairing code provided by the Anker Keyboard, and press Enter on your keyboard. - Pairing the Anker Keyboard with a Tablet:
On your tablet, go to the Bluetooth settings and tap on “Add Device” or “Pair a New Device.” Wait for your tablet to find the Anker Keyboard. Once detected, select it from the list of available devices. If prompted, enter the pairing code provided by the Anker Keyboard, and tap “Connect” or “Pair” on your tablet’s screen. - Pairing the Anker Keyboard with a Smartphone:
On your smartphone, access the Bluetooth settings and tap on “Add Device” or “Pair a New Device.” Wait for your smartphone to discover the Anker Keyboard. Once detected, select it from the list of available devices. If required, enter the pairing code provided by the Anker Keyboard, and tap “Connect” or “Pair” on your smartphone’s screen.
Conclusion
The Anker Bluetooth keyboard is a popular product in 2024.Bluetooth keyboards offer convenience and portability, but they can experience connectivity issues from time to time. By following the troubleshooting tips outlined above, you can overcome these issues and ensure a seamless connection. Regular maintenance and updating the keyboard’s firmware will also help in maintaining its performance and longevity. Remember to take care of your Bluetooth keyboard by keeping it clean and free from dust and debris. With these tips, you can make the most of your Bluetooth keyboard and enjoy hassle-free typing.